Create applications
The Snappi developers portal allows you to integrate your platform with snappi and enable e-commerce and payment functionality.
Creating applications is the first step for you to set up this integration.
Let's walk you through the steps of creating an application:
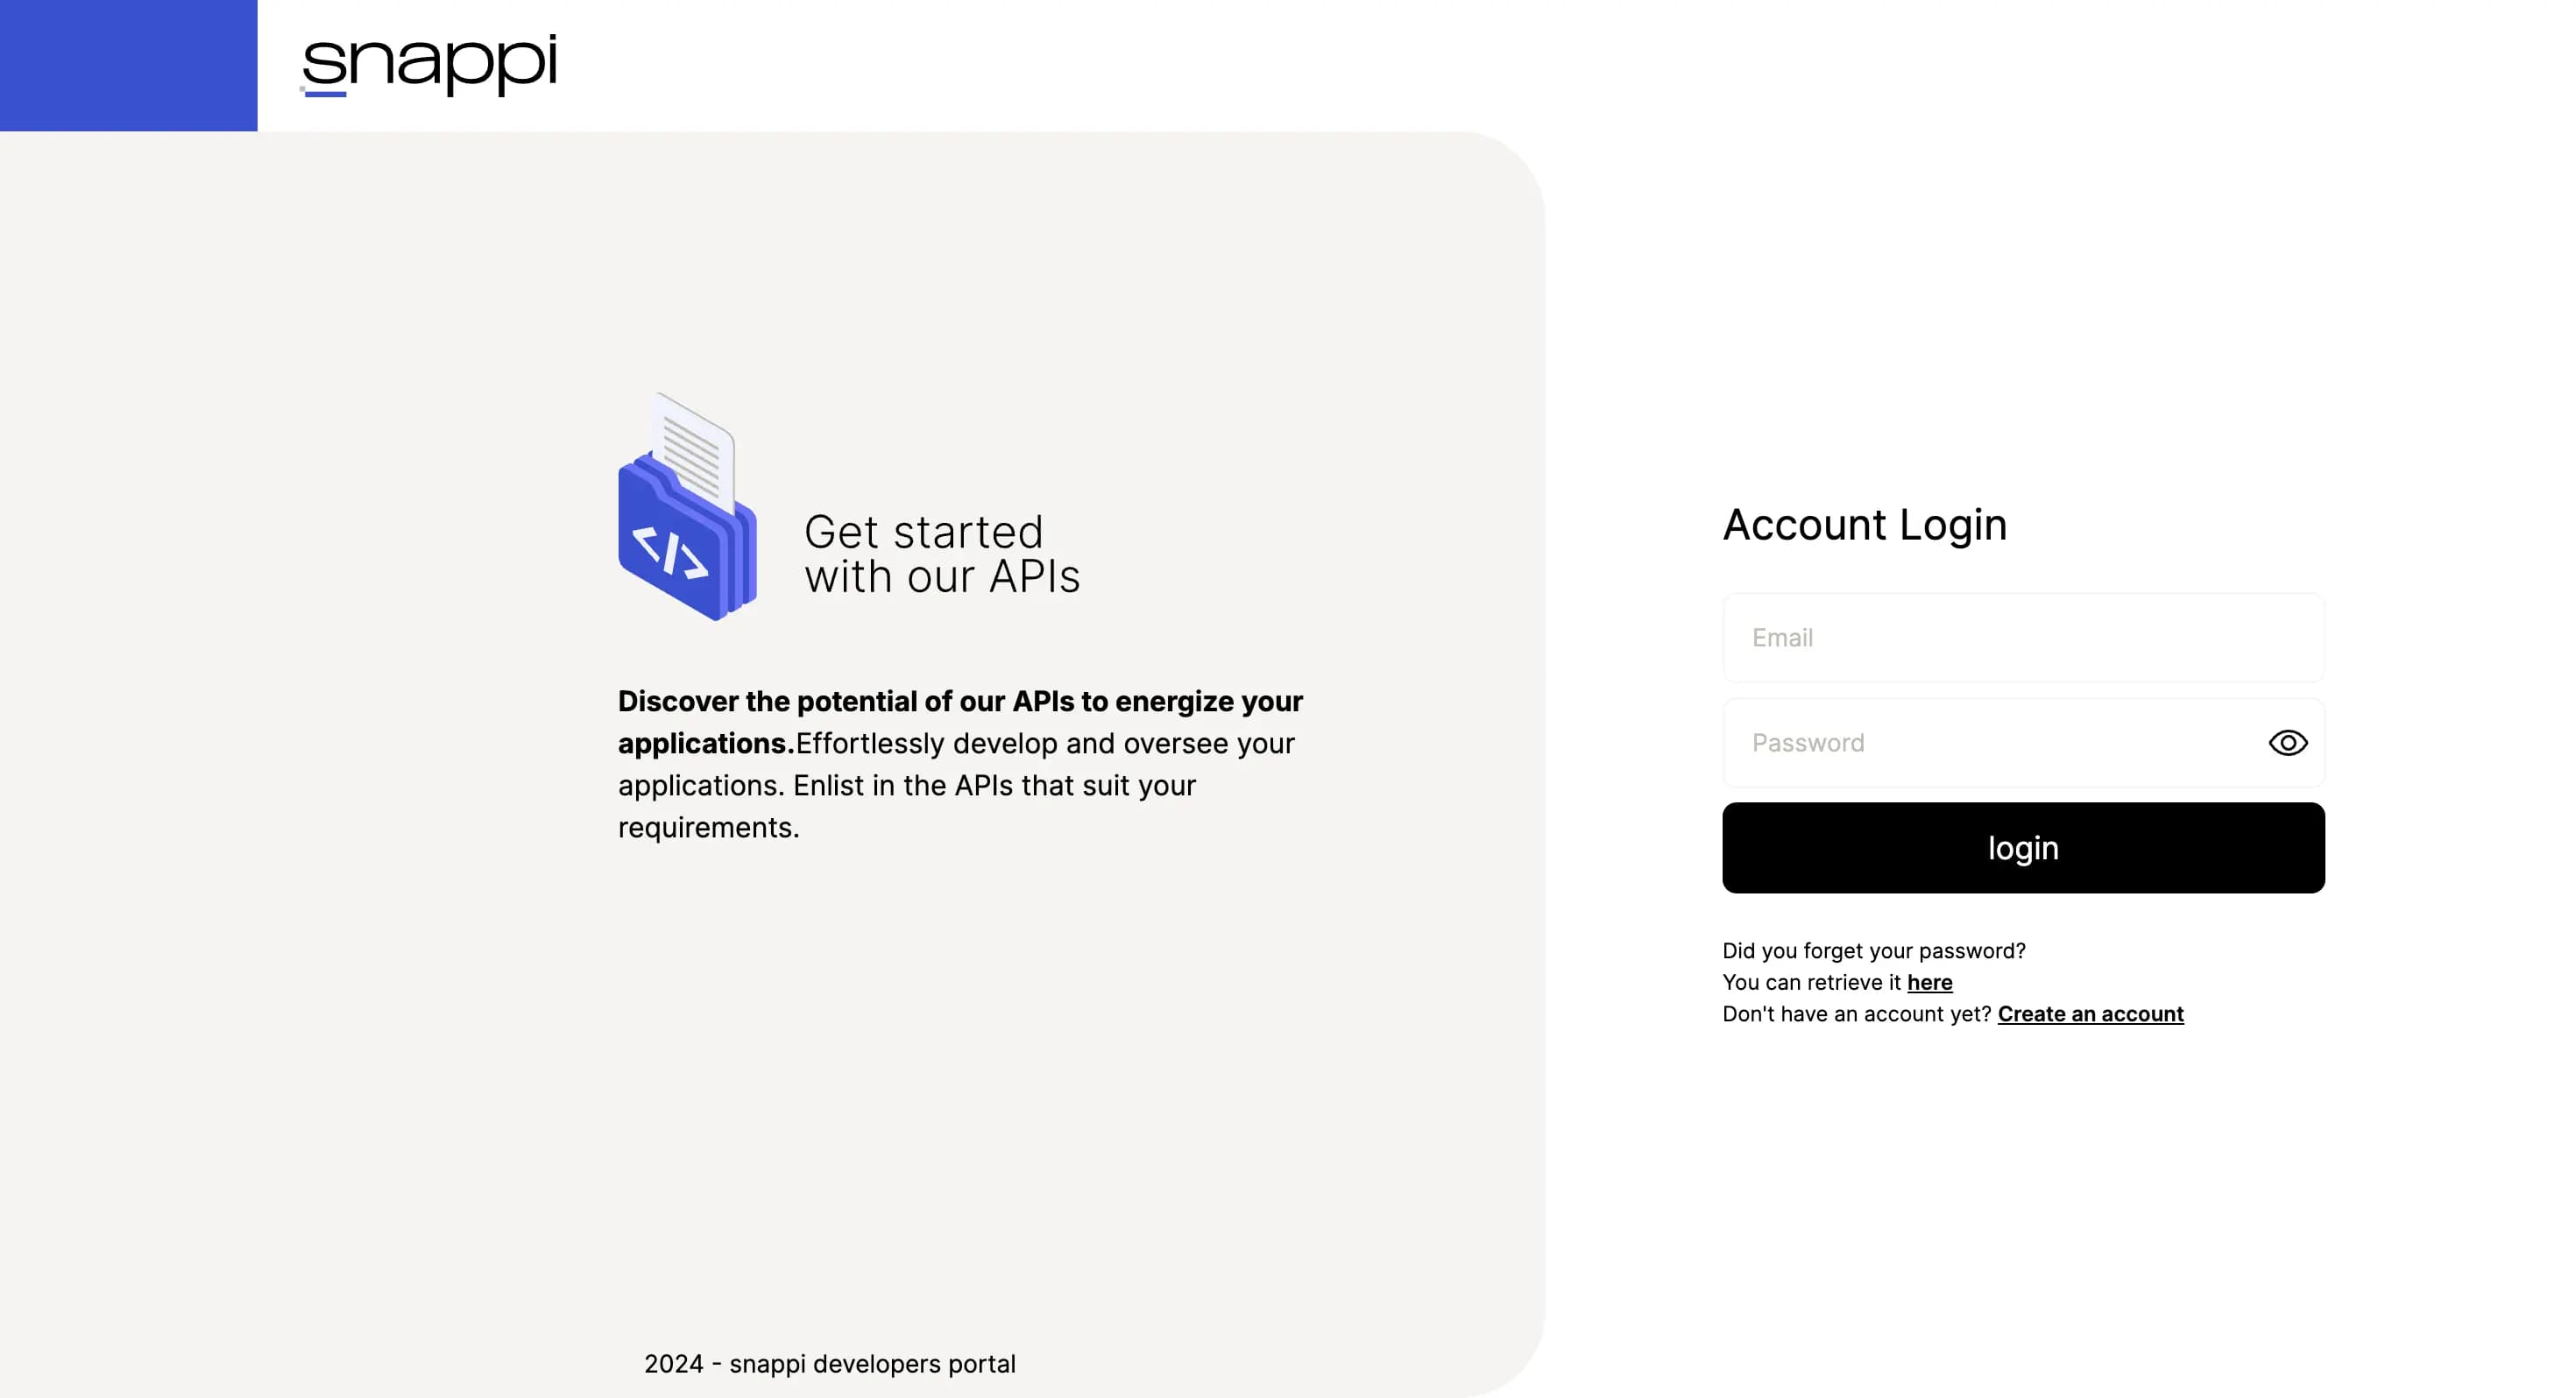
Log into your developers portal account
Log in with your username and password.
Click Create App
Click the Create App button. Launch the application creation process.
Select Application Type
Choose the type of application you wish to create.

Available options:
- Merchant App: for standard merchant applications.
- Merchant App - Sandbox: a sandbox version, used for testing without impacting live systems.
- PSD2 App: for applications compliant with the Payment Services Directive 2 (PSD2), which is necessary for secure online payments and open banking.
Edit your application's data settings
Fill in the required fields for the application you are creating.
Merchant App / Merchant App - Sandbox:
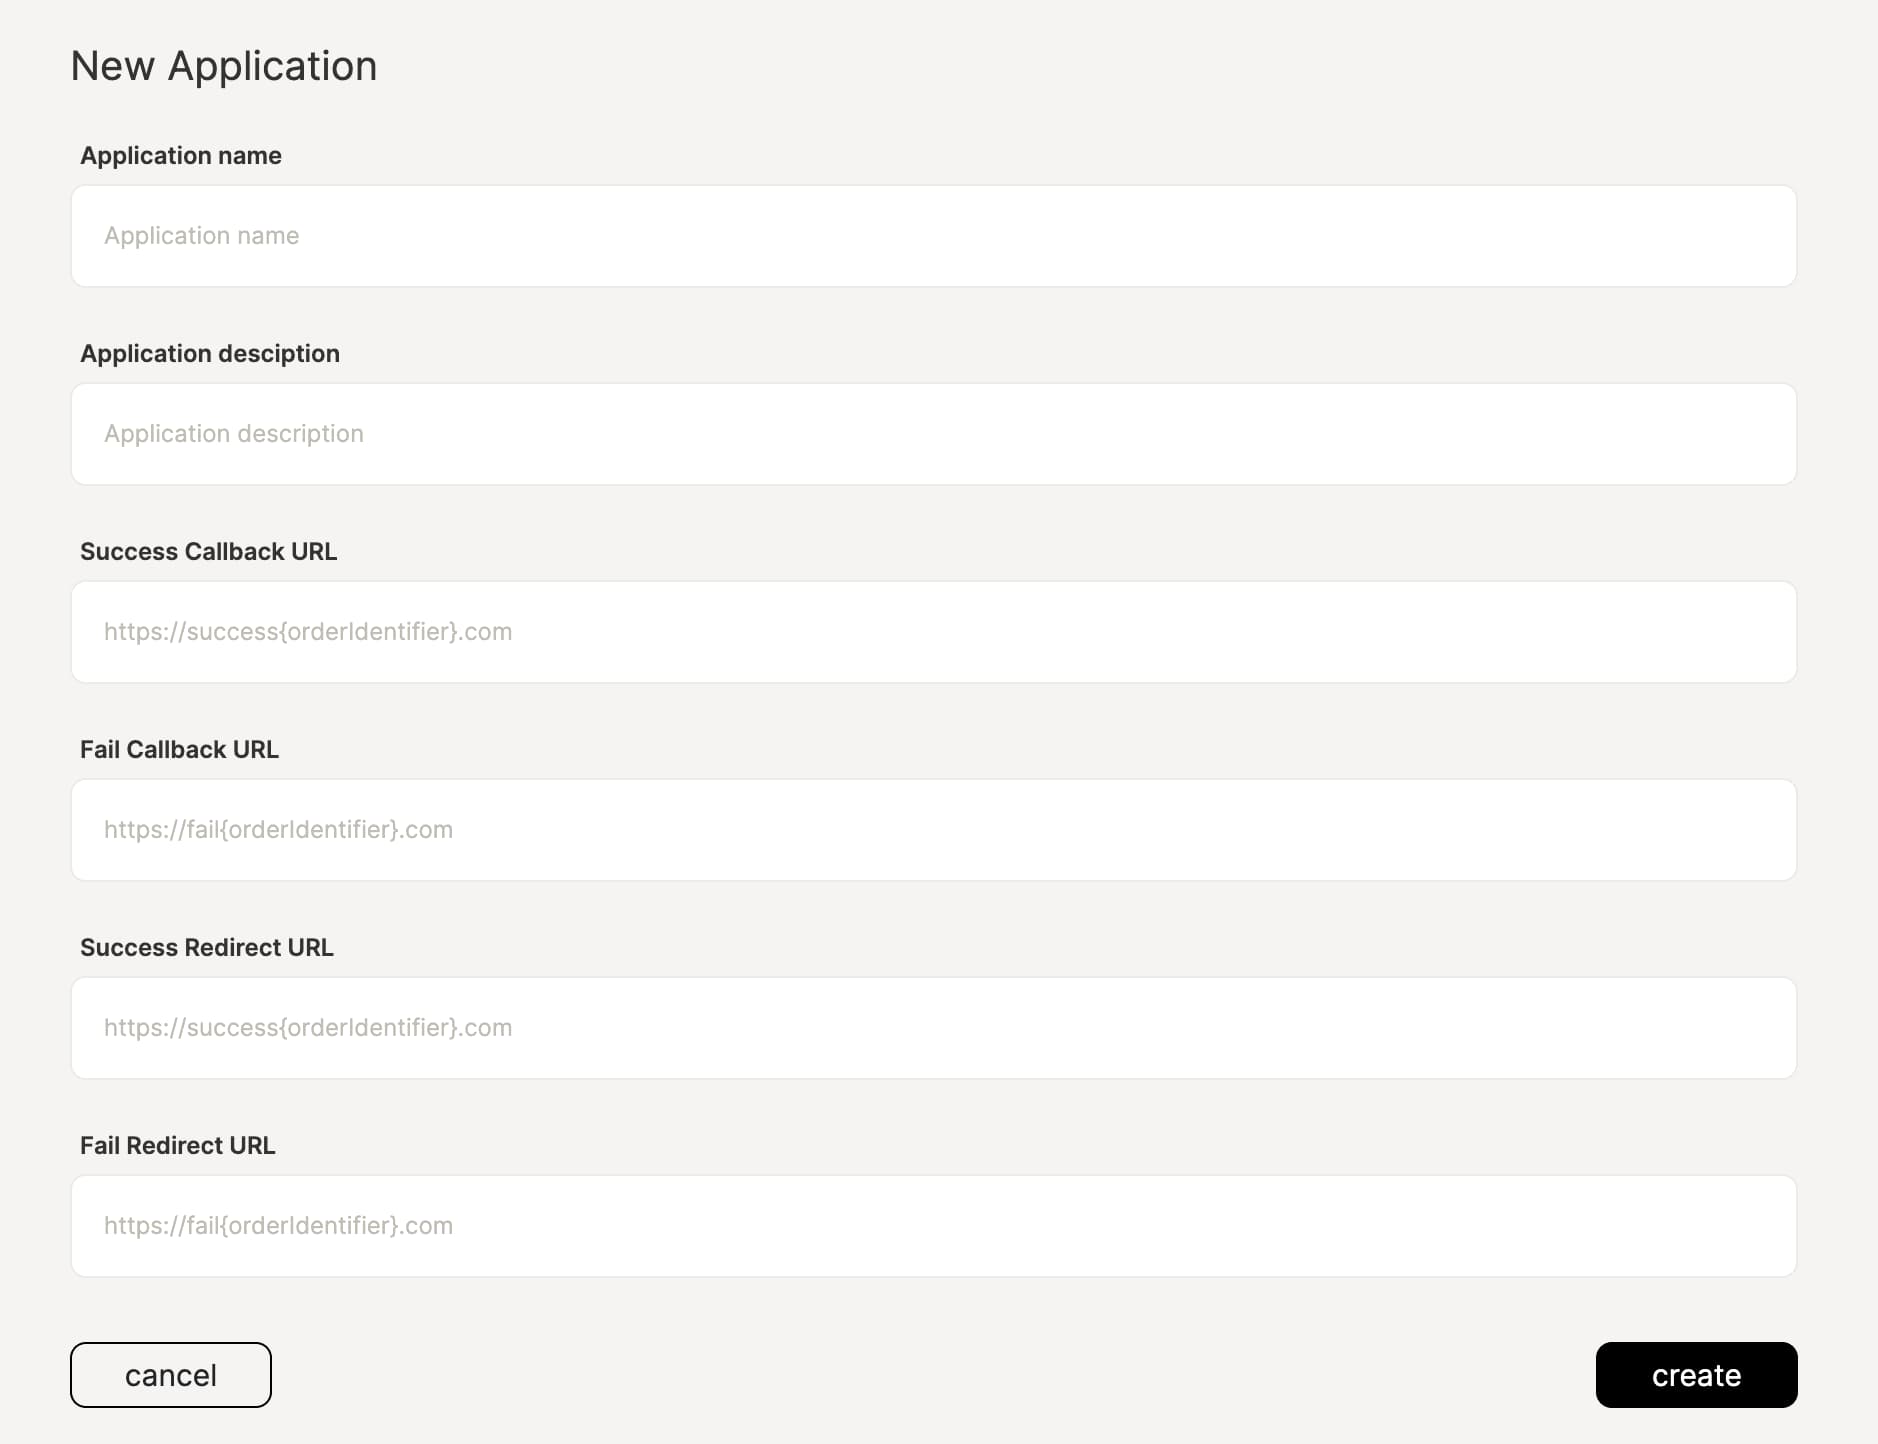
Application name: the name of the application being created.Application description: a brief description of the application’s purpose or functionality.Success Callback URL: the URL used to notify your application when a transaction is successfully completed. The {orderIdentifier} placeholder can be replaced dynamically with the actual order identifier to track specific transactions.Fail Callback URL: the URL used to notify your application when a transaction fails. The {orderIdentifier} placeholder allows tracking of failed transactions by order.Success Redirect URL: after a successful transaction, you will be redirected to this URL. It often leads to a confirmation or thank-you page on your website.Fail Redirect URL: this URL redirects you after a transaction failure, typically taking you to an error page or providing further instructions on how to proceed.
PSD2 App:
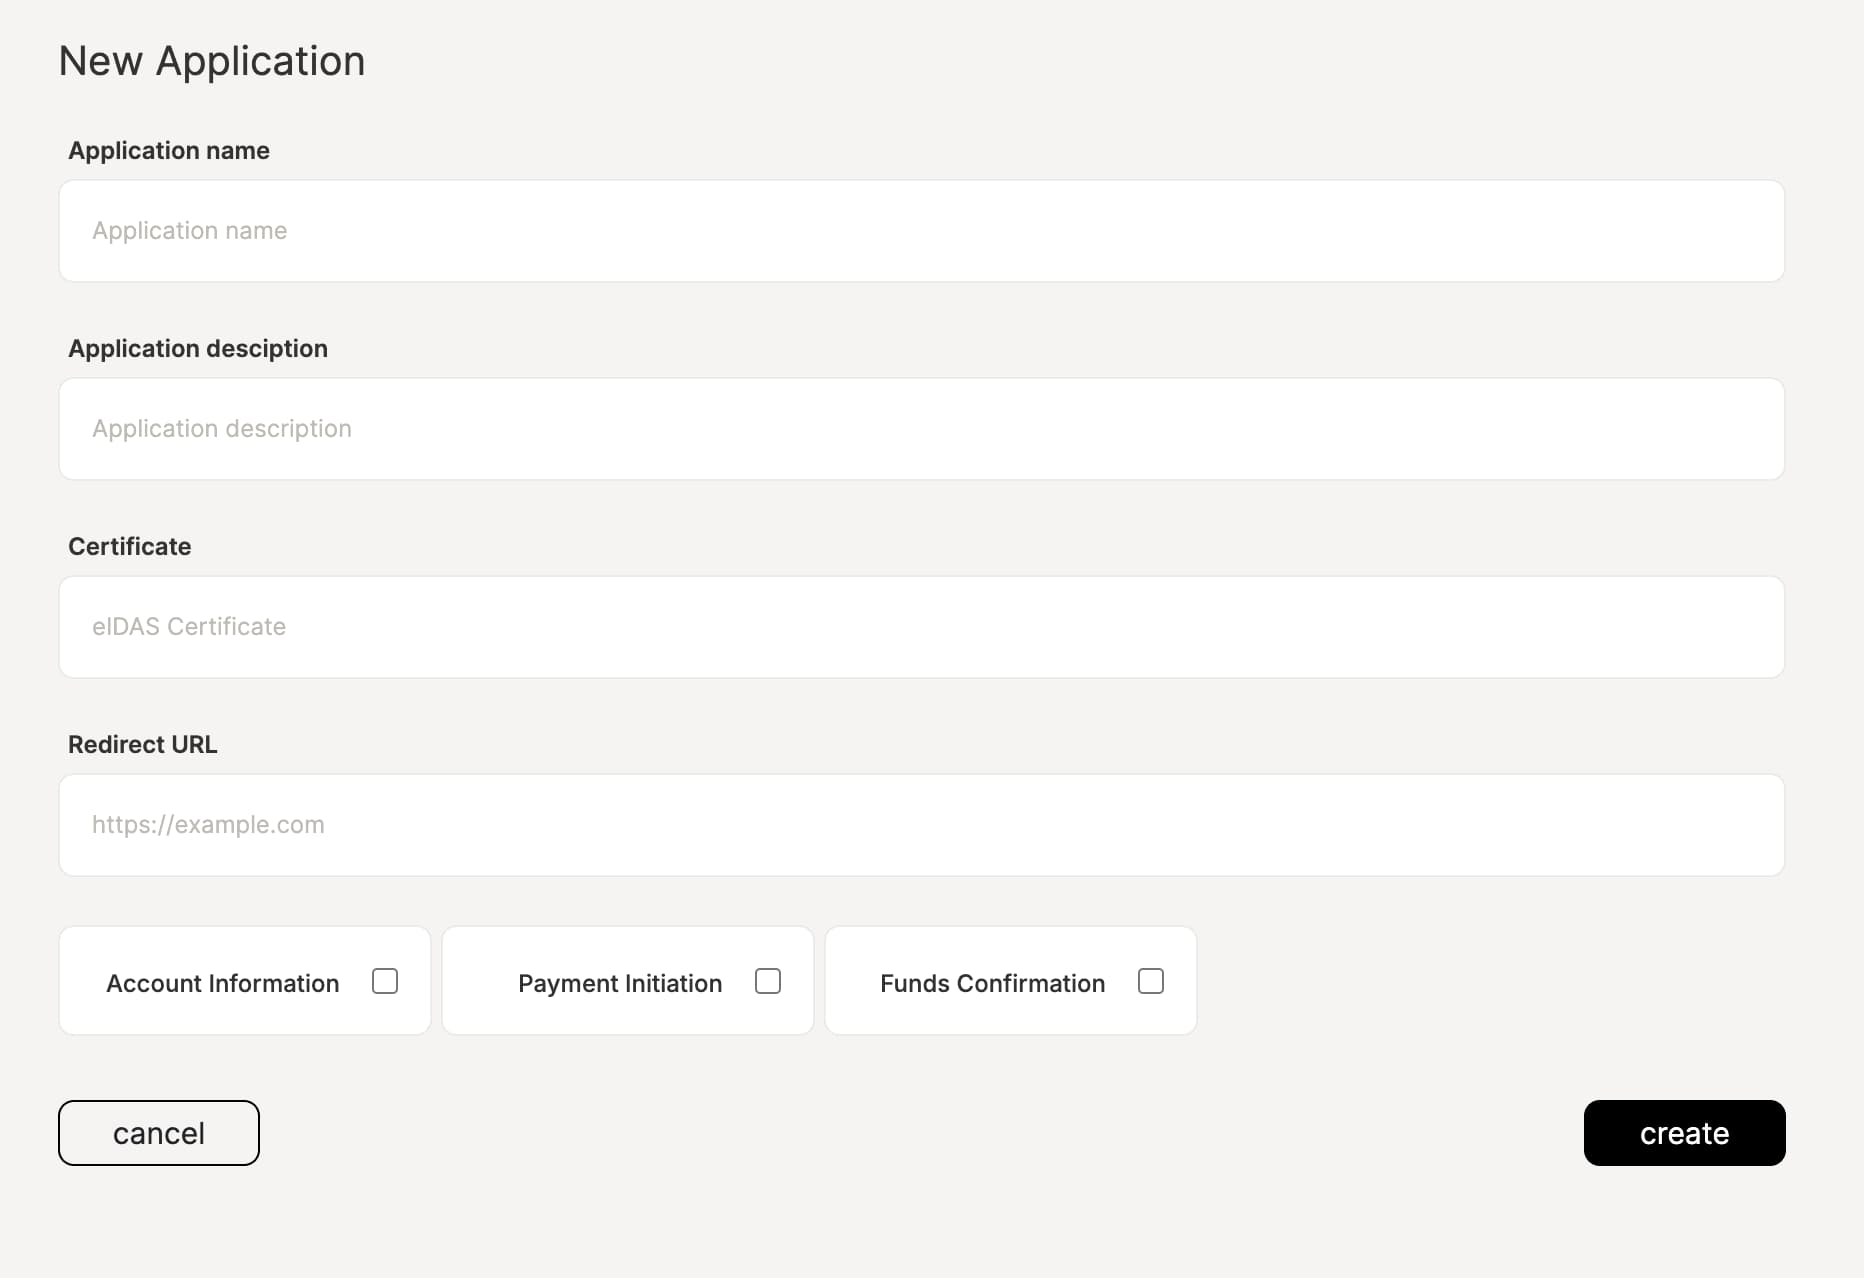
Application name: the name assigned to the PSD2 application.Application description: a brief description outlining the application’s features or use case.Certificate: upload an eIDAS (Electronic Identification, Authentication and Trust Services) certificate, which is crucial for ensuring secure communications and compliance with digital identity regulations.Redirect URI: specify the URI (Uniform Resource Identifier) where the application will redirect users after certain actions, such as consents or payments.
-
Account information: enable access to account information services, allowing the application to retrieve account details.
-
Payment initiation: enable payment initiation services, allowing the application to initiate payments.
-
Funds confirmation: enable funds confirmation services, allowing the application to confirm the availability of funds.
Generate your application
Once you have provided all the required fields, click the Create App button to finalize the application setup.
Verify the newly created app
Finalize your new application you have just created in the dashboard.
Cancel if necessary
If you decide not to proceed, click Cancel and discard any provided data. Abort the process and return to the previous screen or main dashboard.